 So, I think that, with everything in life, it is just as important - perhaps MORE important - to talk about our "failures" as well as our successes. Today's post is about one of those failures. Though this was not a complete disaster (complete with cussing, hair pulling, frustrated moping or anything), it didn't turn out the way I envisioned in my head, probably because I am just learning to use a sewing machine and I don't know a whole lot about seam styles, techniques, or even how to adjust thread tension, which has been a constant sore spot with this sewing machine.
Anyway, I have wanted a case for the Nook Tablet that my Tommy Lee bought me for my birthday last year for quite a while now. But I couldn't find a case that I really liked and I knew that I could make one if I put my mind to it and ever found the time. After spending the last two weeks armpit deep in a graphic design project for a joke writer in Las Vegas and prepping to go into full-on production mode on a friend's book project, I decided to take a day off. So, this lazy Sunday afternoon, I decided that I would finally make the Nook case I had been planning in my head for almost a year.
Lately, I have really been into recycling cardboard boxes that have been building up since Christmas. I don't want to haul them to the dump or burn them since most of them are sturdy shipping boxes, so I have been making things out of them, like a set of three toy boxes out of diaper boxes, a project that took a few hours a couple weeks back:
 |
| From This.... |
 |
| ...To This! |
But I digress. Anyway, so this project, too, started with a cardboard shipping box:

I just put the Nook on it and drew around it to make a template, and then cut out the cardboard I needed.

I had a couple bundles of quilting fabric in awesome Atomic Age, retro prints, so my baby girl and I chose what pieces we'd be using:

After deciding what pieces went where and for what purpose, I figured out my measurements, which are as follows:
- 4 pieces, 6"X9" (cover fabric and lining fabric; I used two different prints, so, two of each for me, but if you're using the same fabric, then you'd still need four, just all four the same fabric, obviously)
- 2 pieces 5.5"x3" (pockets)
- 2 pieces 5.5"x1" (pocket trim)
- 1 piece 3"x9" (spine)
- 8 pieces 1"x6" (cover and lining trim pieces for top and bottom)
- 4 pieces 1"x9" (cover and lining trim pieces for side edges)
- 2 pieces 1.25"x3" (pieces to hold the Nook in place)
A side note here: my spine was a little too wide. if I were doing this again, I would cut it at 2.5" x 9".
So, anyway, I started cutting fabric, just using my cardboard templates as a guide and giving my self about half an inch on all sides for seam allowances:

Then, I started laying out the pieces, starting with the cover fabric and spine:

And then laying the lining fabric and pockets on top, just mocking everything up:

And then mocked out the trim pieces:

And then cut out the fabric for the straps that would hold the Nook into the case:

Though these are bright orange, in the end, when it came time to sew them in, I swapped them for the brown patterned fabric, as I liked it better than the orange.
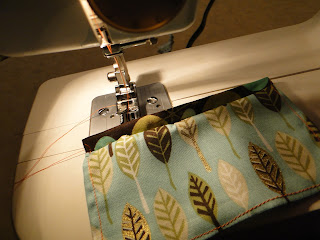
Anyway, next, I started sewing the trim pieces on first, folding the trim pieces in half and sewing from the outside (showing) side:

I just folded the trim pieces over so the seams wouldn't show. Then, I trimmed the pockets:


And hemmed the raw pocket edges:

While doing this, it occurred to me that just the cardboard inside the fabric might be a little hard, so I grabbed a piece of thin packing foam I had saved and cut out pieces to put on both sides of the cardboard:

Next, I sewed the pockets onto the left-hand lining piece using a zigzag stitch:

With all the pockets and trim sewed to the lining, I started assembling the thing, and this is where, dear readers, you're going to get fewer pictures of the process, as I realized that this project wasn't going to look quite the way I envisioned. Anyway, before sewing, I ironed the pieces so that there wouldn't be any wrinkles and so the the trim would lay flat while I stitched it together:

And then I started sewing the outside to the inside:

Once I had two pockets fully assembled and the holders for the Nook sewed on to the right-hand lining, I stuffed the insides with the foam and cardboard, making a cardboard sandwich between the two layers of foam:


And then I started sewing the thing together, and it was then that I realized several things, all at once:
- I had cut the spine too wide;
- I had allowed too much for seam allowances on the edges of the cover and lining fabric;
- The way I did the trim around the outside was COMPLETELY wrong;
- I wasn't sure I liked the contrasting orange thread showing.
So, I stopped taking pictures of the process and just focused on getting the thing put together. After sewing the two covers to the spine, I hand stitched a brown ribbon closure to the outside edges and stuck the Nook inside:


In all honesty, outside of the fact that it is a little larger than I anticipated, and it looks handmade and not professional - what can you expect from a beginning seamstress making something without a pattern while learning to use a sewing machine - it's actually not all that bad. I actually really like it - still like it a lot better than the covers you can buy - and I am pretty proud of myself.


